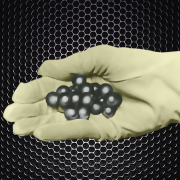
 CS-3-.25$67.50At Bal-tec™, quality is of the utmost concern. We use the Talyrond System to measure sphericity of balls. The overall accuracy of this system is one-millionth of an inch. The size of balls are measured using a Heidenhain Certo 60 to an accuracy of 10-millionths of an inch and is calibrated using standards traceable to NIST. Most balls are produced to the Anti-Friction Bearing Manufacturers Association (A.F.B.M.A. Book 10), military specifications, or our customers' needs. Bal-tec™ stocks over 40,000 different sizes, grades and materials of balls.
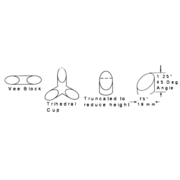 Flat Prismatic Components For Kinematics$45.00FP-75-CY - 3/4” diameter (19mm) Tungsten Carbide Cylindrical Post, Truncated at a 45-degree angle. Young's modulus of elasticity of 98,000,000 P.S.I. and high hardness of 91-HRA--has been chosen as the standard material.
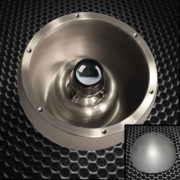 Integration Spheres$413.00 – $682.00Bal-tec Integration Spheres are highly accurate laser scanning targets. These spheres are aluminum with a “satin finish“, which means they have an ideal lambertian finish for laser scanning. The ball is hollowed out and a nest is created inside to locate a 1.5 inch (38mm) diameter SMR. The location of the integration sphere can be measured using both, a laser scanner and a laser tracker.
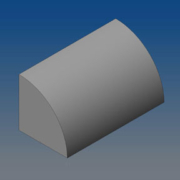 Kinematic Quarter Round$53.90 – $163.90The Quarter Round is a different approach in kinematic design. A different reality is unlocked by simply thinking in different terms. How do you describe the surface of a Kinematic Platform? Is it the top of the physical plate or could it be better defined as the central plane of the kinematic system? What this changes is the very nature of the kinematic system. In order to achieve very high levels of mechanical perfection i.e. geometry and surface texture in the kinematic elements, they are produced as separate entities that are then attached to the platform. In order to get enhanced physical properties, i.e. hardness, stiffness and corrosive resistance in kinematic elements that are better than the material of the platform itself, the same approach is used. By simply burying these enhanced kinematic elements in self supporting trenches that are machined into platform proper, the rigidity and the resonate frequency of the platform can be
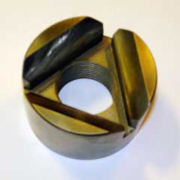 Monolithic Trihedral — Kelvin Clamp$217.80TRH-75-SM - Monolithic Trihedral (3/8”, .375”, 9.525mm) TRH-2000-SM - Monolithic Trihedral, 2” Diameter
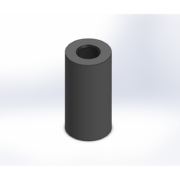 Plain Flat Kinematic Component$19.80 – $23.10F-75-SM - Flat Cylinder, Surface Mounted 3/4” (0.75”, 19.05 MM) - $22.00 F-75-CPM - Flat Cylinder, Post Mounted 3/4” (0.75”, 19.05 MM) - $23.10 F-875-SM - Flat - Surface Mounted 0.875” (7/8”, 22.22MM) - $19.80
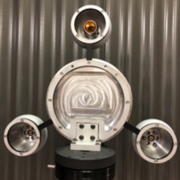 PLATE TARGET$587.00 – $2,174.00For a given instrument setting, the number of points on a target that is farther from the IUT is less than that for a target that is closer to the IUT. For a sphere target , this issue is exacerbated by the fact that the return intensity is not the same from all the locations on its surface. A return beam corresponding to lower return signal intensity may not register with the instrument , resulting in missing points from a sphere’s outer periphery (compared with data from the sphere‘s surface at the center). This reduces the coverage area of the scan data on a sphere at the farther location, compared with that at the nearer location (as illustrated in figure 9). This in turn increases the error when calculating the center of the sphere using a nonlinear least squares fitting algorithm.
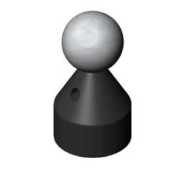 Probe Characterization Sphere$253.00 – $275.00PROBE CHARACTERIZATION SPHERE, CERAMIC, 19.05 MM, 0.75 INCHES PM-PB-B75-C $253.00 PROBE CHARACTERIZATION SPHERE, RUNT, ALUMINUM OXIDE, 25.4 MM, 1.00 INCHES PM-PB-B100-AO-R $253.00 PROBE CHARACTERIZATION SPHERE, RUNT, CERAMIC, 19.05 MM, 0.75 INCHES PM-PB-B75-C-R $253.00 PROBE CHARACTERIZATION SPHERE, RUNT, CERAMIC, 25.4 MM, 1 INCHES PM-PB-B100-C-R $253.00 PROBE CHARACTERIZATION SPHERE, RUNT, SATIN FINISH, 12.7 MM, 0.5 INCHES PM-SAT-B50-R […]
 Short Adapter Screws$18.43We carry a full line of Dual Threaded Adaptor Screws which have a different thread on each end. These threaded adaptors will match all of our Coordinate Measuring Machine evaluation and fixture building devices to the threads in the table of any C.M.M. or competitor's pallet system. The short version of these threaded adaptors (Table #1) have an overall length of 1.5 inches (38.1 mm) and each of the threads is 3/4 inch (19 mm) long, except the 1/4 inch-20 to M10 x 1.5, where the 1/4 inch diameter is only 1/2 inch (13 mm) long.
